Starting seeds indoors gives you a head start on the season and opens up a far wider choice of crops than any garden centre offers in trays. There's real satisfaction in raising a plant from a seed you held in your palm, and it's cheaper too, since a single packet can produce dozens of plants. For anyone growing vegetables, it's a skill worth having.
It does ask for a bit more care than sowing straight into the ground, because you're standing in for everything the outdoors would normally provide — warmth, light, and the right amount of water, all in the right measure. None of it is difficult once you understand the sequence. This guide walks through the four things that decide success: timing your sowing, giving enough light, keeping the deadly damping-off at bay, and easing your plants outdoors when the time comes.
Get the timing right#
The most common seed-starting mistake happens before a single seed goes in: sowing too early. It's tempting to start in the depths of winter out of sheer eagerness, but a seedling that's ready weeks before the weather is becomes a problem rather than a head start. It outgrows its pot, stretches toward weak light, and turns weak and straggly while it waits.
Work backward from the point when it's safe to plant outside in your area, which for tender crops means after the risk of frost has passed. Your seed packet is the best guide here, usually telling you how many weeks before that last frost date to sow each crop. Count back from that date and you'll have a rough sowing schedule that lands your seedlings outdoors at just the right size.
Different crops need different lead times, so don't sow everything on the same day. Slow starters like peppers and tomatoes are begun earlier, while fast growers are sown closer to planting-out time. A little planning here means your plants arrive at the garden gate ready to go, rather than leggy and impatient — if you're mapping out the wider season, our seasonal garden care calendar helps you line up the timing.
Give seedlings all the light they need#
Once seeds germinate, light becomes the thing that matters most, and it's where windowsill sowings so often go wrong. Seedlings need bright, direct light for many hours a day, and the low, weak sun of early spring rarely delivers enough through a window. Starved of light, they stretch tall and spindly, reaching for brightness that isn't there.
That stretching is called being leggy, and it's the classic sign of too little light. A leggy seedling has a long, weak stem that can't support the plant properly, and it rarely recovers into something sturdy. Strong light from the moment the shoots appear is what produces the short, stocky seedlings you're after.
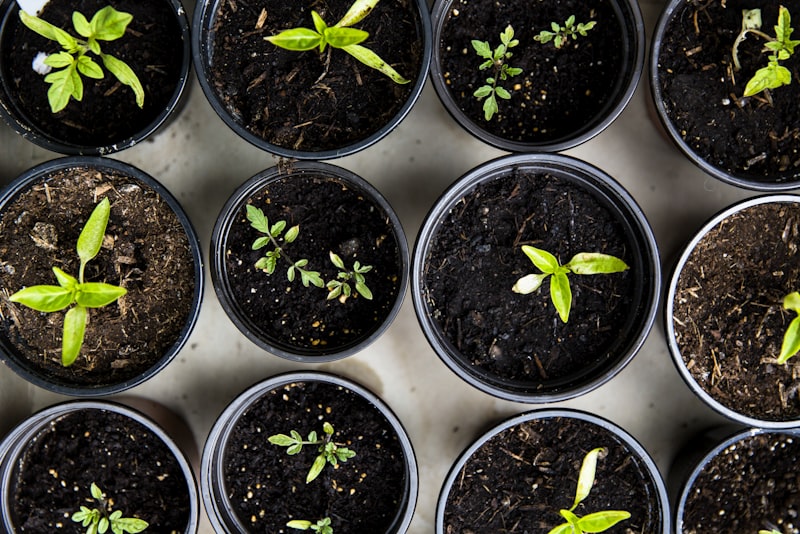
A stocky, deep-green seedling has had enough light. A pale, stretched one is telling you it needs more, and no amount of feeding will fix what's really a light problem.
If a bright windowsill isn't enough, turning the trays daily helps them grow evenly instead of leaning, and keeping seedlings close to whatever light source you have makes a real difference. Many indoor growers use a simple grow light to give consistent brightness, which sidesteps the whole problem. Understanding how plants read light indoors is genuinely useful here, and our guide to finding the right light for indoor plants is worth a read.
Keep damping-off at bay#
Damping-off is the heartbreak of seed starting: healthy seedlings that suddenly keel over, their stems pinched and rotten right at soil level, collapsing overnight for no obvious reason. It's caused by fungal problems that thrive in damp, still, crowded conditions, and once it takes hold in a tray it spreads fast. The good news is that it's almost entirely preventable.
Prevention comes down to keeping conditions clean and airy rather than warm and soggy. A few habits make the difference:
- Use clean pots and trays, washed out if you're reusing them from last year
- Start with fresh seed compost rather than old or garden soil
- Water carefully and let the surface dry slightly between waterings
- Give seedlings space and gentle airflow so leaves and soil aren't constantly wet
- Water from below when you can, letting the tray soak it up rather than splashing from above
The theme running through all of it is avoiding the constant dampness that fungal trouble loves. Seedlings need moisture, but they don't want to sit in permanently wet, stagnant soil. A little air movement, a touch of restraint with the watering can, and clean equipment will see most trays through unharmed.
Harden off before planting out#
Seedlings raised indoors have led a sheltered life, with no wind, no direct sun, and no cold nights, so they can't simply be moved straight into the garden. A plant taken from a warm windowsill and planted out in one go gets a real shock, and it may stall, scorch, or collapse from the sudden change. The answer is a gradual process called hardening off.
Hardening off means introducing your seedlings to outdoor conditions little by little over a week or two. Start by putting them outside in a sheltered, shaded spot for a short spell during the day, then bring them back in. Each day, extend the time outdoors and expose them to a bit more sun and breeze, until they're spending full days and eventually nights outside. This slow toughening lets them adjust their leaves and stems to the harsher reality of the garden.
Don't rush this stage, however keen you are to get planting. A week or so of patience produces sturdy plants that shrug off transplanting, while skipping it can undo all the weeks of careful raising that came before. Once they've hardened off and the weather is genuinely settled, they're ready to go into their final home — and if that home is a fresh bed, it's worth reading how to start a vegetable garden so the ground is prepared to receive them.
Bringing your seedlings through#
Seed starting is a sequence of simple steps done in order: sow at the right moment, flood them with light, keep the damp-loving fungus away, and toughen them up before they face the world. Get those four things right and the rest tends to look after itself. Each season you'll refine your timing and read your seedlings a little better.
There will be trays that don't come up and seedlings that don't make it, and that's part of the process rather than a verdict on your ability. Sow a few more than you need, keep notes on what worked, and treat every batch as practice. Raising your own plants from seed is one of the most rewarding parts of growing, and once you've filled a garden with plants you started on a windowsill, buying trays never feels quite the same.